

The Annapurna Circuit isn’t easy, but it’s doable. Thousands of regular people complete it every year with the right prep.
It’s rated moderate to challenging. You won’t need ropes, crampons, or climbing experience. But you will need real fitness, patience, and respect for the altitude.
This guide is for first-timers and moderately fit hikers who want the truth, not marketing fluff. By the end, you’ll know exactly what to train for and what to expect.
I’ve guided treks in Nepal for over a decade, personally leading 20+ Annapurna Circuit trips with Himalaya Hub. This isn’t based on one trip or secondhand research, it comes from watching hundreds of trekkers work through this route, season after season.
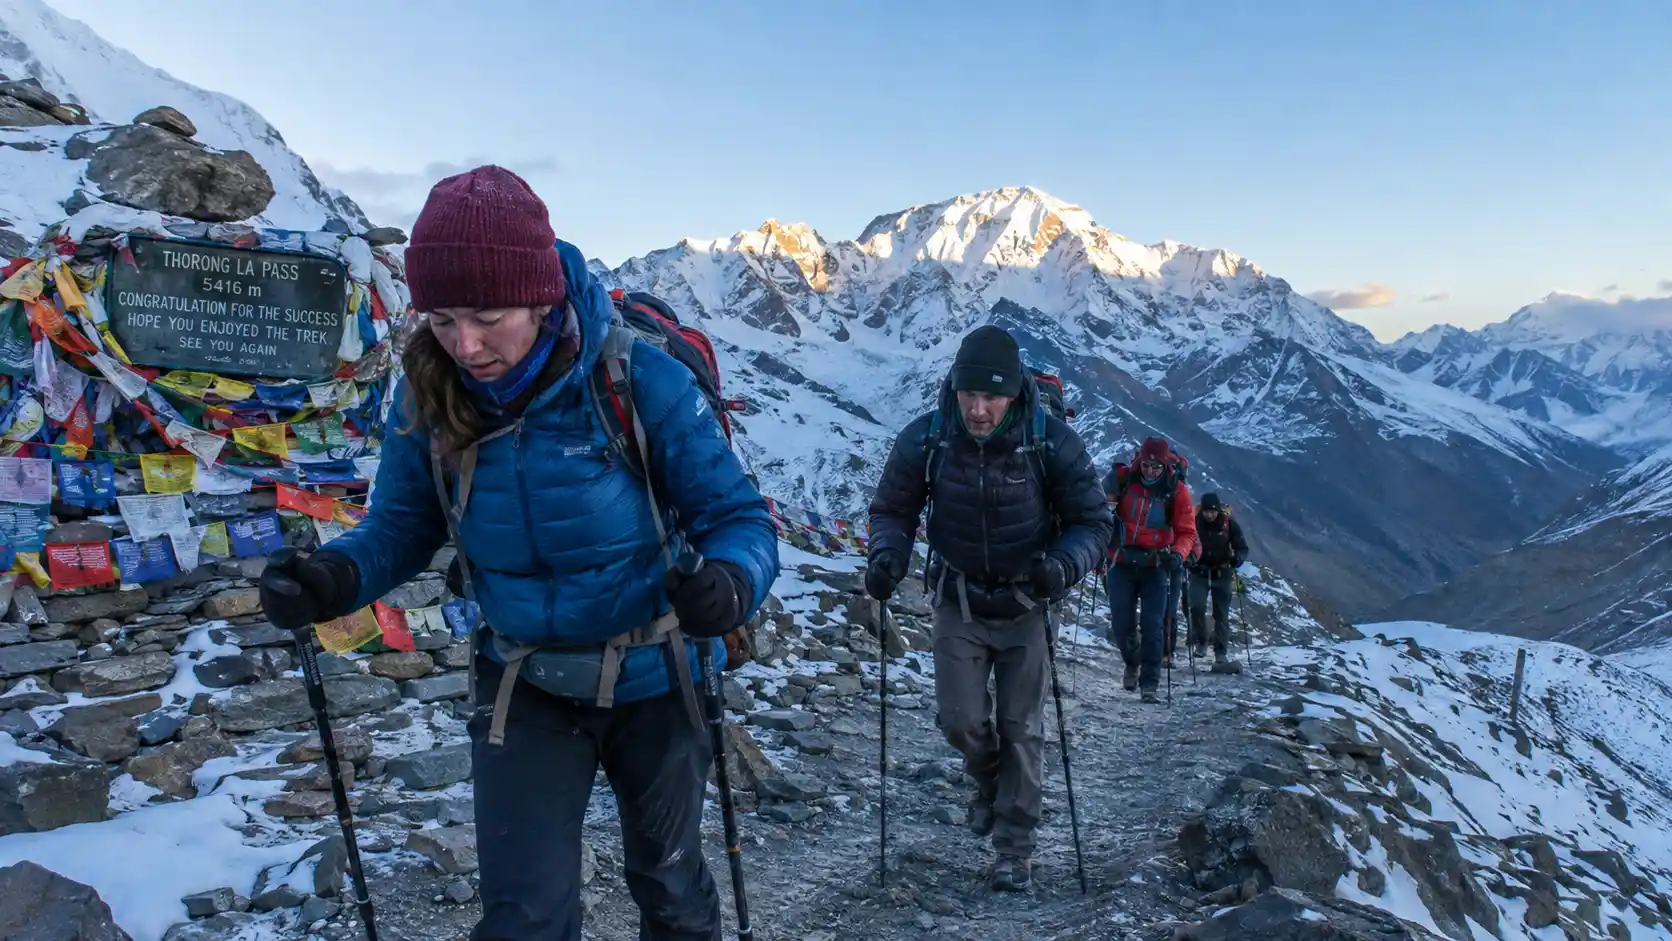
A pattern I see every time: On Day 9, at Thorong La, even well-trained trekkers feel sudden shortness of breath near the top. That’s normal at that elevation. What carries them through is slowing down and trusting the pace their guide sets.
How Hard Is the Annapurna Circuit Trek?
Here’s the short version, so you can decide fast:
| Factor | Difficulty | What it means in practice |
| Technical skill | None | No ropes, no crampons, no climbing experience needed. |
| Physical fitness | Moderate–High | You should comfortably walk 6+ hours/day with a light pack for 2+ weeks. |
| Altitude challenge | High | Max 5,416 m at Thorong La; AMS risk rises above ~3,500 m. |
| Trek length | 12–20 days | Typical itineraries are 14–18 days; total distance 160–230 km. |
| Daily walking | 5–8 hours | Some days shorter, pass day longer and more demanding. |
| Good for beginners? | Yes, with training | First-timers succeed if they train and respect altitude. |
| Upper age limit? | None | People in their 60s (and some 70s) complete it with good fitness and pacing. |
Now let’s break down exactly why it earns this rating, and where the real difficulty comes from.
What Makes the Annapurna Circuit Trek Difficult?
The Annapurna Circuit isn’t technically hard – no ropes, no ice axes, no climbing experience needed. But it asks a lot from your body and mind over 12–20 days. The difficulty is real, and it comes from five specific factors. None are deal-breakers with the right preparation but underestimate any one of them, and a rewarding trek can turn into a miserable one fast.
1.High Altitude & AMS Risk
At Thorong La Pass (5,416m), you are breathing roughly half the oxygen available at sea level. Above 3,000m, Acute Mountain Sickness (AMS) becomes a real threat. It doesn’t care how fit you are; it cares about your ascent rate and hydration. To handle this safely, gain no more than 300–500m of sleeping altitude per day, drink 3–4 liters of water daily, and never skip your scheduled acclimatization days in Manang.
2.Long Trekking Days (5–8 Hours)
One long day isn’t the problem. Twelve long days in a row is. Tired legs on Day 3 feel nothing like tired legs on Day 9. The fatigue builds quietly. Because lower oxygen slows down cellular recovery, you wake up a little more drained every single morning. The ultimate test is the Thorong La crossing day itself, which often stretches to 8–10 hours and usually starts with a freezing 3:00 AM wake-up call.
3.Trek Distance (160–230 km)
You’re covering 160 to 230 km of real mountain trail, depending on your route. While you can take a local jeep to skip the lower, driveable sections like Besisahar to Chame, you are still putting in serious mileage. This isn’t a weekend hike. A 10 km walk at 4,000m takes twice as long and demands twice the cardiovascular effort as it does at sea level.
4.Changing Terrain
The trail never lets your body settle into a rhythm. In a single week, you’ll hike through subtropical jungle, dense pine forest, high-altitude desert, and rocky glacial moraine. Stone steps hammer your quads on the way up, loose gravel and scree test your ankle stability near the pass, and the massive 1,600m descent into Muktinath will wreck your knees. Trekking poles are not a luxury here; they are an absolute necessity to save your joints and keep you balanced.
5.Unpredictable Mountain Weather
Weather here doesn’t just make you uncomfortable; it dictates your safety and can change your itinerary overnight.
- Spring (Mar–May): Best overall window. Mild days, but expect afternoon cloud buildup and freezing nights.
- Monsoon (Jun–Aug): Genuinely difficult. Leeches, landslides, and washed-out trails make it risky and miserable.
- Autumn (Oct–Nov): Peak season. Epic, clear views, but crowded trails and nights dropping to -15°C.
- Winter (Dec–Feb): Experts only. Heavy snow, -20°C temps, and frequent pass closures.
Even in peak season, clear mornings can turn into biting wind and snow by afternoon. Always pack a proper layering system, a moisture-wicking base, an insulating mid-layer, and a windproof shell to handle the sudden shifts.
Day-by-Day Difficulty: Where the Annapurna Circuit Gets Harder
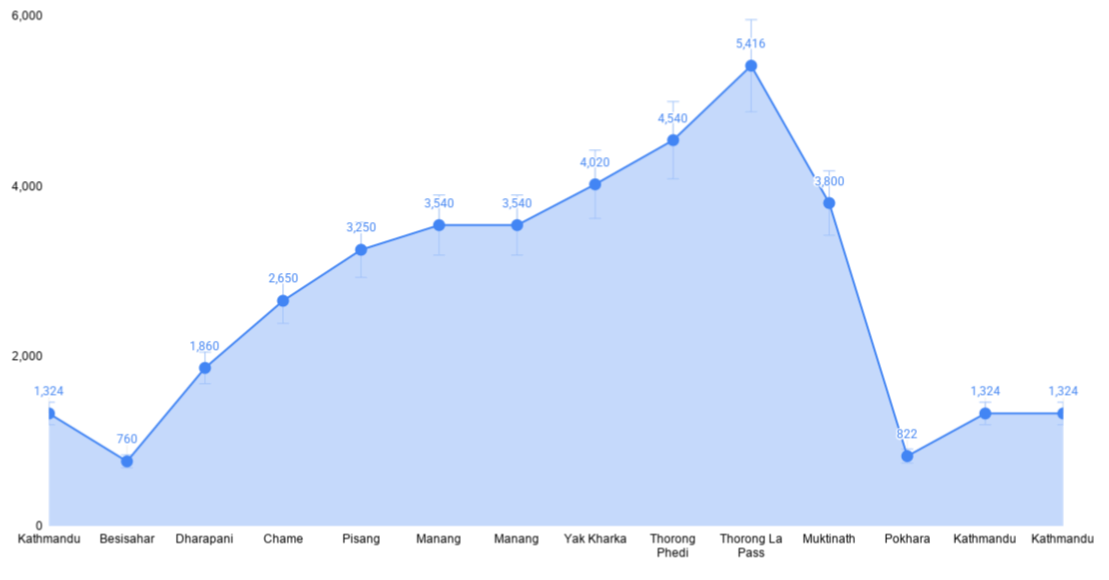
The Annapurna Circuit doesn’t feel equally hard every day. It builds gradually as you climb, and it peaks hard on one specific day.
This table shows altitude, oxygen level, and difficulty for each stage of a real Annapurna Circuit 12-day itinerary.
| Stage / Days | Altitude Range | Oxygen vs. Sea Level | Difficulty | What Makes It Hard |
| Days 1–2: Kathmandu → Besisahar → Dharapani | 760m–1,860m | ~81–95% | 2/10 | Long 9-hour drive, winding mountain roads, little walking |
| Days 3–4: Dharapani → Chame → Pisang | 1,860m–3,250m | ~69–81% | 4/10 | 14–15.5 km walking days, steady climbing, increasing altitude |
| Day 5: Pisang → Manang | 3,250m–3,540m | ~66–69% | 5/10 | Longer 16 km day, steep upper-route climb, thinner air |
| Day 6: Manang Acclimatization | 3,540m | ~67% | 3/10 | Short 3–4 hour acclimatization hike; altitude adjustment is the focus |
| Day 7: Manang → Yak Kharka | 3,540m–4,020m | ~67–60% | 6/10 | 11 km climb, sparse vegetation, noticeably thinner air |
| Day 8: Yak Kharka → Thorong Phedi/High Camp | 4,020m–4,880m | ~60–54% | 7/10 | Steep sections, cold temperatures, thin air, possible High Camp stay |
| Day 9: Thorong Phedi → Thorong La → Muktinath | 4,540m–5,416m–3,800m | ~58–51% | 9/10 | Pre-dawn start, extreme altitude, cold and wind, 16 km descent |
| Days 10–11: Muktinath → Pokhara → Kathmandu | 3,800m–1,324m | Rising toward sea level | 3/10 | Long mountain/highway drives and residual leg fatigue |
| Day 12: Departure | 1,324m | ~87% | 1/10 | Airport transfer and onward travel |
Notice the pattern: the trek gets progressively harder from Chame onward. Altitude becomes the main challenge after Manang. And Day 9 – the Thorong La Pass crossing is by far, the toughest day of the trip.
Is Thorong La Pass the Hardest Part of the Trek?
Yes. If one day is going to test you, it’s this one.
Most groups start around 4 or 5 in the morning. It’s dark, the wind bites, and the air feels noticeably thinner than the day before. Some years, the trail near the top is dusted with snow.
Here’s the part people don’t expect: the descent is often harder than the climb. You drop more than 1,600 meters into Muktinath, and that pounds your knees for hours after the summit wears off.
Before the pass, most first-time trekkers I guide are quietly worried the altitude will hit them harder than they expect. During the climb, mild shortness of breath is common, normal at that altitude, but unsettling the first time it happens to you. What I tell every group: slow your pace, match your breathing to your steps, and trust that the discomfort passes. In 20+ crossings, that simple advice has gotten every well-prepared client through safely.
Physical Difficulty vs. Comfort Difficulty – What’s the Real Challenge?
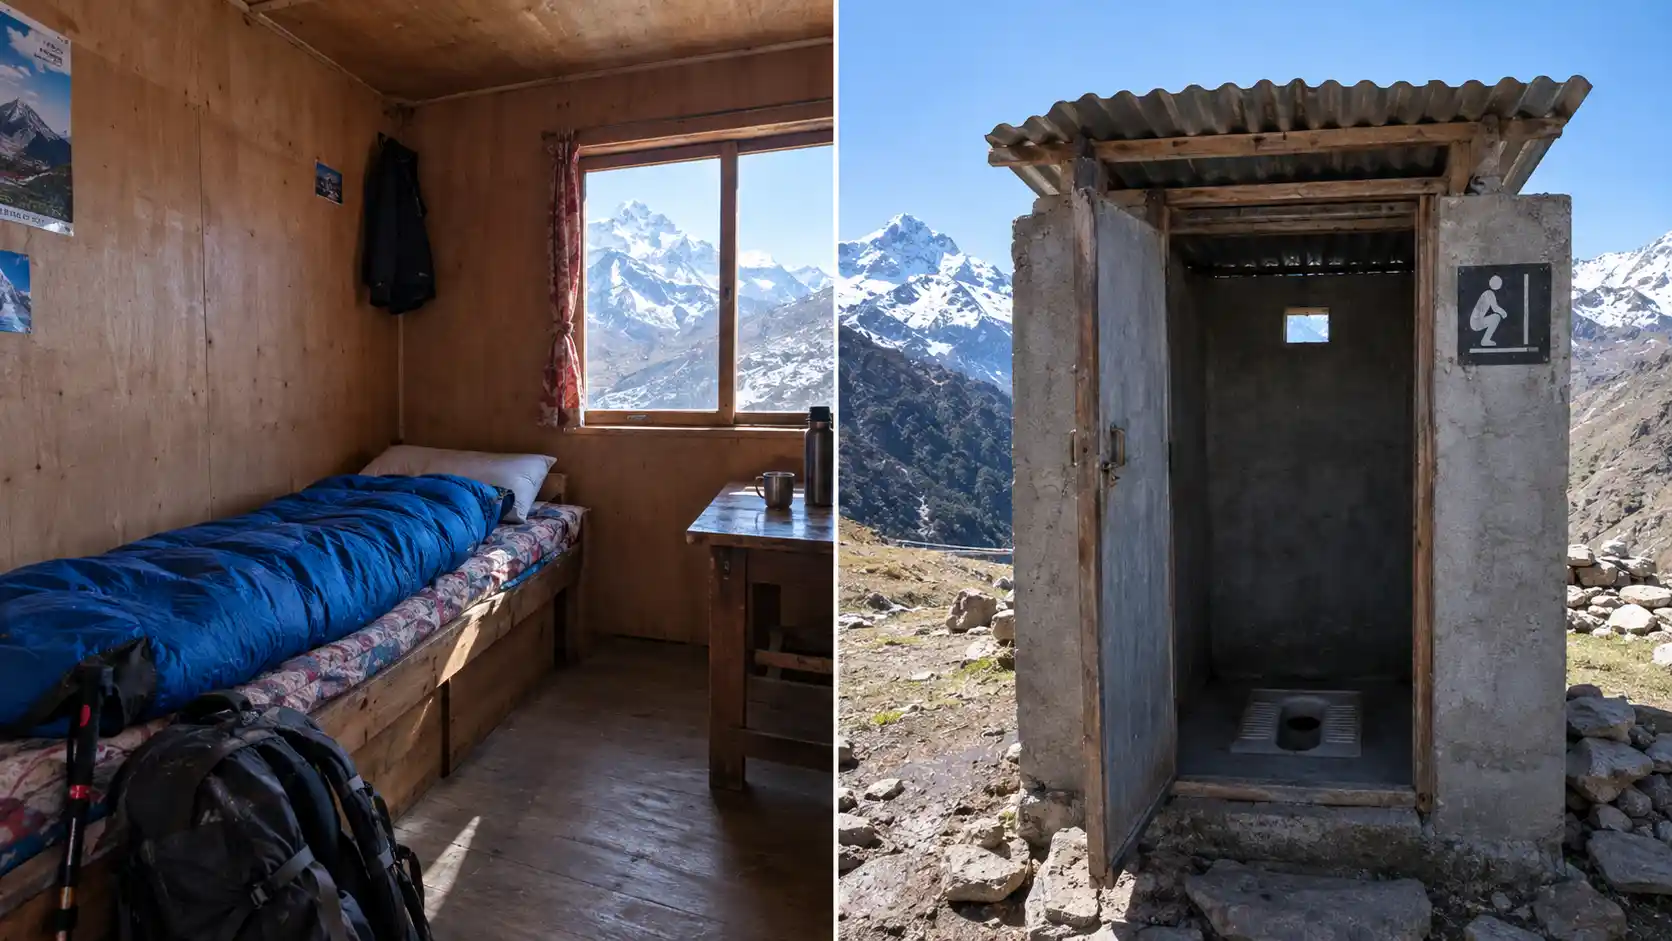
Altitude and terrain test your body, but “comfort difficulty” tests your mind. These conditions won’t physically stop you, but they will quickly wear down your morale if you aren’t prepared.
Here are the 5 comfort challenges that surprise most trekkers:
- Squat Toilets Become the Norm
Western flush toilets disappear above 3,500m (Manang, Thorong Phedi). Squat toilets are standard, often shared or located outside, with no toilet paper provided. Always carry your own paper, hand sanitizer, and a small trowel. - Wi-Fi and Phone Signal Fade Out
Connectivity drops drastically above Manang, becoming patchy or completely non-existent near the pass. Don’t rely on calls or uploads, and expect to pay extra (USD 1–5 per device) to charge power banks at high camps. - Food Gets Simpler and Pricier
Teahouse menus shrink as you climb, limiting options to basic carbs, soups, and dal bhat. Meat is strictly discouraged above Chame due to food safety risks, and meal prices can double or triple near the pass. - Teahouse Rooms Are Cold with No Heating
There is no room heating anywhere on the circuit. Above 3,500m, rooms feature thin plywood walls, basic mattresses, and sub-zero nighttime temperatures. A sleeping bag rated to at least -10°C is an absolute necessity, not a luxury. - Sleep Gets Harder Above 4,000 Meters
Even when completely exhausted, deep sleep at high altitude is rare. Lower oxygen, the cold, altitude headaches, and snoring in dorm-style rooms disrupt rest. Expect a few restless nights at High Camp; it’s completely normal, not a sign of failure.
Knowing these challenges ahead of time changes everything. If a cold, sleepless night at 4,500m feels miserable, nothing is wrong with you, it’s just part of the Annapurna Circuit experience.
Is the Annapurna Circuit Trek Good for Beginners?
Yes, if you train and pace yourself. You don’t need any technical climbing skills. However, “beginner-friendly” does not mean “easy.” It means the route is accessible with real preparation, this is not a casual weekend walk.
On age: There is no strict upper age limit. Trekkers in their 60s and beyond complete this route every season. The secret for older trekkers or those new to high altitude is simple: adopt a slower, steadier pace and get a quick pre-trip doctor check-up for peace of mind.
Here is the honest truth from over a decade of guiding this route: success on the Annapurna Circuit is ultimately about pacing and mindset, not raw athletic ability. In my 20+ trips leading this trail, I’ve seen complete, nervous beginners reach Muktinath safely far more often than ultra-fit, experienced hikers who underestimated the altitude and pushed too hard. Feeling nervous before you go is completely normal, and it doesn’t predict how you will do. Respect the mountain, train properly, listen to your body, and you will be absolutely fine.
Annapurna Circuit vs. Other Nepal Treks: Which Is Harder?
If you’re weighing your options, here’s how the Annapurna Circuit stacks up against four other popular routes.
| Trek | Max Altitude | Days | Trail & Infrastructure | Overall Difficulty |
| Annapurna Circuit | 5,416m (Thorong La) | 12–20 | Longest overall, most terrain variety, best teahouse infrastructure of the group | Moderate–Challenging |
| Everest Base Camp | 5,364m (5,644m with Kala Patthar) | 12–14 | Well-maintained trail, but the flight to Lukla adds risk and stress; more days spent above 4,000m | Moderate–Challenging |
| Manaslu Circuit | 5,106–5,160m (Larkya La) | 12–18 | Rougher, steeper trail; more remote with fewer teahouses and less emergency access | Hardest of the group |
| Annapurna Base Camp | 4,130m | 7–12 | Shorter, well-established trail, easiest acclimatization curve | Easiest of the group |
| Langtang Valley | ~4,984m (Kyanjin Ri) | 7–10 | Closest trek to Kathmandu, no flight needed | Easy–Moderate |
If you’re picking based on difficulty alone: Manaslu is the toughest day-to-day, thanks to its rugged trail and thin support network. Annapurna Circuit wins on length and variety. Everest Base Camp is harder mentally, mostly because of the Lukla flight and back-to-back days above 4,000 meters. Annapurna Base Camp and Langtang Valley are your best bets if you’re short on time or fitness.
How to Make the Annapurna Circuit Trek Easier
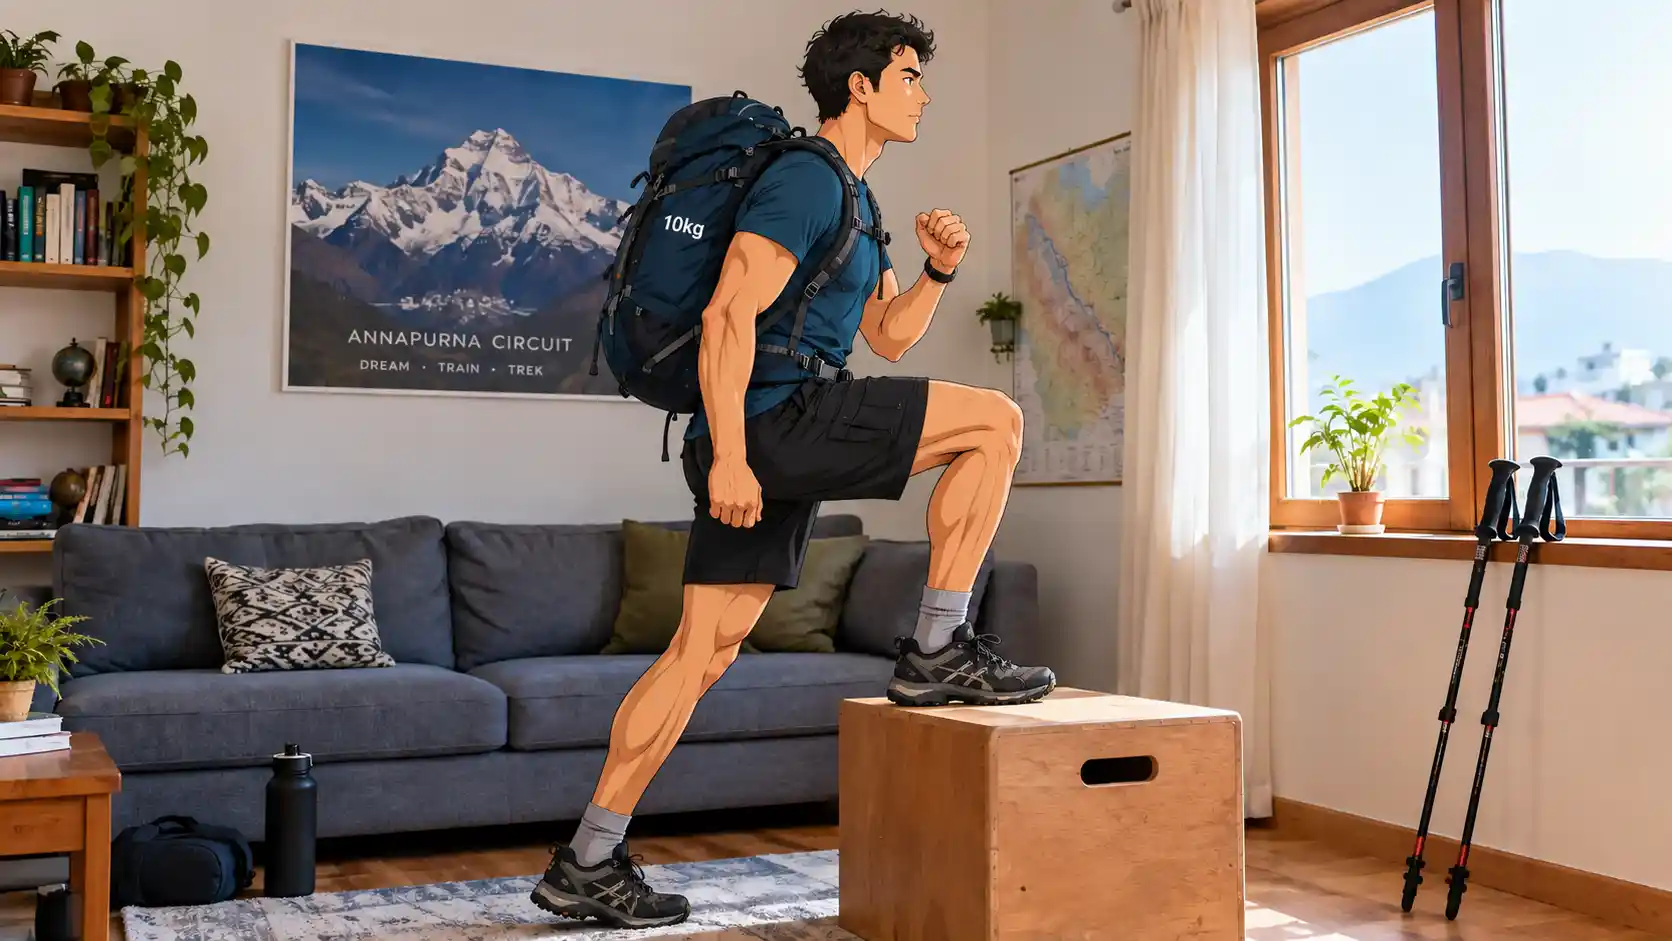
Difficulty isn’t fixed. How you prepare changes almost everything about how the trek feels.
Train Your Legs, Core, and Back (6–8 Weeks Out)
- Legs: squats, lunges, step-ups, and calf raises – these carry you up the ascents and control your knees on the descents
- Core: planks, sit-ups, and Russian twists – these keep you balanced on uneven trail
- Back: deadlifts or resistance-band work – these get you ready to carry a loaded pack all day
- Cardio: hill walking, stair climbing, cycling, or running – do it with a weighted pack when you can, to mimic trail conditions
Practice Back-to-Back Training Days
This is the step most people skip. One hard training day won’t prepare you for twelve hard days in a row.
Try this: a 2-hour uphill hike one day, followed by a 90-minute stair-climbing session the next. It builds the kind of recovery ability the actual trek demands.
Use your trekking poles during these sessions, too. Don’t try them for the first time on the trail.
Pack Light – With Real Numbers
- Main duffel (carried by your porter): aim for 10–15 kg
- Daypack (carried by you): keep it under 5 kg
- Break in your boots before you fly out, and pack foot powder to prevent blisters
Overpacking is one of the most common and most avoidable reasons this trek feels harder than it needs to.
Pick the Right Season
Spring (March–May) and autumn (September–November) give you the clearest skies and safest trail conditions. Monsoon season brings landslides and leeches. Deep winter brings snow-blocked passes.
Prepare Mentally, Not Just Physically
Practice positive self-talk during your training hikes, not just on trek day. Persistence and steady pacing beat raw athletic ability almost every time.
Tough moments on the trail are normal. They’re not a sign that something’s wrong with you or your fitness.
Hire a Guide or Porter
A guide sets a safer pace, spots early AMS symptoms before you do, and makes the tough calls on route and weather. In more than 20 trips leading this route, I’ve watched this one decision make the biggest difference in how manageable the trek feels, especially for first-timers.
Get Travel Insurance That Covers High Altitude
Because of the remoteness and altitude, insurance with helicopter evacuation and medical coverage matters here. It won’t make the trail any easier. But it takes the worst-case scenario off your mind.
How to Avoid Altitude Sickness on the Annapurna Circuit
Altitude sickness (AMS) is the single biggest risk on this trek, especially near Thorong La Pass (5,416m). The good news is that with smart preparation, it is highly preventable. Follow these 5 essential rules:
- Plan a Smart Acclimatization Schedule
Your itinerary is your first line of defense. Above 3,000m, limit your sleeping altitude gain to 300–500 meters per day. Build mandatory rest days into your plan, especially a minimum of two nights in Manang (3,540m). Use this time for a “climb high, sleep low” day hike (like to Ice Lake) to stimulate your body’s adaptation without overloading it. - Trek Slowly and Watch for AMS Symptoms
Trek bistari bistari (slowly, slowly). Your breathing should be controlled enough to hold a conversation while walking. Pay close attention to your body for early AMS warning signs: a persistent headache, nausea, dizziness, loss of appetite, or unusual fatigue that sleep doesn’t fix. - Follow the Golden Rule of Altitude Safety
If mild symptoms appear, rest and hydrate at the exact same altitude. If your symptoms get worse, stop climbing. If they become serious (confusion, persistent vomiting, or breathlessness at rest), descend immediately. Never try to push through severe altitude sickness. - Drink 3–4 Liters of Water Daily
Dry mountain air and increased breathing cause rapid fluid loss. Aim for 3–4 liters of water daily above 3,000m. Strictly avoid or limit alcohol and heavy sedatives, as they dehydrate you, disrupt sleep, and mask the early warning signs of AMS. - Consult a Doctor Before Using Diamox
Some trekkers use acetazolamide (Diamox) to aid acclimatization. However, it is a helpful tool, not a substitute for a proper itinerary and slow pacing. Always consult a doctor before your trip to discuss dosage and suitability. Additionally, carrying a simple pulse oximeter to track your oxygen saturation trends can provide valuable peace of mind.
Who Should Wait Before Attempting This Trek?
This trek isn’t right for everyone, right now. Consider waiting, getting medical clearance, or choosing a lower-altitude trek (like Annapurna Base Camp) first if:
- You have untreated or uncontrolled health conditions: This includes heart or lung issues, severe anemia, uncontrolled diabetes, a history of severe altitude sickness (AMS), or if you are pregnant. High altitude puts extra strain on the body, and specialist clearance is a must.
- You have zero training time or a poor baseline fitness: If you cannot comfortably walk 5–7 hours on hilly terrain at home, or are recovering from recent surgery or illness, you need an 8–12 week structured training plan before attempting this.
- You plan to rush the altitude: Booking an ultra-short itinerary, skipping mandatory acclimatization days to save time, or planning to “push through” headaches and nausea are the main drivers of serious mountain emergencies.
None of these mean “never.” They simply mean “not yet, and not like this.”
With proper preparation, medical clearance, and a smarter, well-paced itinerary, the mountain will still be there when you are truly ready.
Conclusion
The Annapurna Circuit is moderate to challenging, not extreme, but certainly not a casual walk. It demands respect for the altitude, patience on the long days, and a willingness to embrace basic teahouse comforts.
However, with the right training, a smart itinerary, and a steady pace, it is a highly achievable goal for regular, motivated trekkers.
Remember: success on this trail isn’t about being the fastest or the fittest. It’s about preparation, listening to your body, and trusting the process. If you are still building your plan, start with your training schedule and your acclimatization days. Both matter far more than raw athletic ability.
The mountain isn’t going anywhere. Take the time to prepare properly, respect the altitude, and you will cross Thorong La with a sense of accomplishment that lasts a lifetime.
Frequently Asked Questions
Annapurna Circuit trek harder than Everest Base Camp?
They’re close, but different kinds of hard. Annapurna Circuit is longer with more varied terrain. Everest Base Camp is shorter but keeps you at high altitude for more consecutive days, and the Lukla flight adds its own stress.
How many hours a day do you walk on the Annapurna Circuit?
Most days run 5 to 8 hours of walking, depending on the stage and your pace. The Thorong La Pass day runs longer, often 8 to 10 hours including the descent.
Do I need a guide for the Annapurna Circuit trek?
It’s not always required by law, but it’s strongly recommended. A guide helps with pacing, spots AMS symptoms early, and handles route and weather decisions you might not be equipped to make alone.
What is the hardest day on the Annapurna Circuit trek?
Day 9, the crossing from Thorong Phedi over Thorong La Pass down to Muktinath. It combines the highest altitude, the coldest conditions, and the longest descent of the trek.
Is there an age limit for the Annapurna Circuit trek?
No official upper limit. Trekkers in their 60s and beyond complete this route regularly, usually with a slower pace and extra rest days.
Is Thorong La Pass dangerous?
It’s demanding, but not technical. The real risks are altitude sickness and sudden weather changes, both of which proper pacing and acclimatization manage well.
Do I need travel insurance for this trek?
Yes. Given the altitude and remoteness, insurance covering high-altitude trekking and helicopter evacuation is worth the cost for the peace of mind alone.
0 Comment